Home - Projects - IWBs - Interactive - Image Manipulation - Animation - Presentations - Multimedia Tutorials - Other Tutorials - Art Links - About
Shift + Control + M

Tutorial
Step 1: Preparing the
resources
Step 2: Making the composite
portrait
Step 3: Animating the
portrait
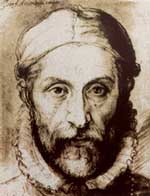
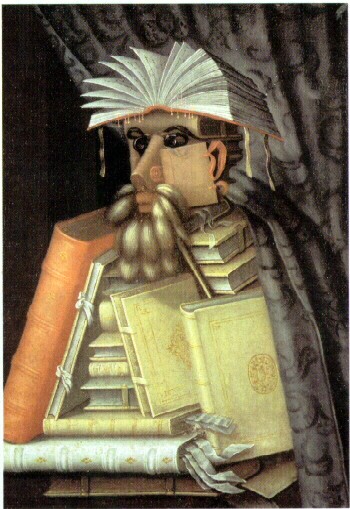
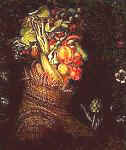
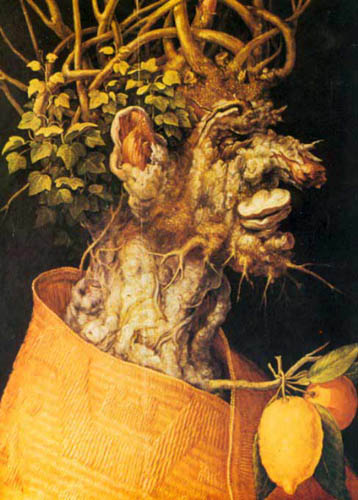
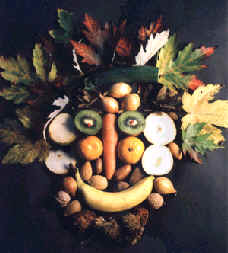
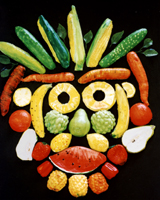
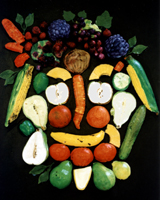
Giuseppe Arcimboldo (1527 - 1593),
Renaissance artist and court painter, produced a series of strange but recognizable
allegorical portraits of
leading figures at
the Hapsburg court in the XVIth century. There are fewer than thirty
portraits in total, half of them copies made by the artist himself, but
all have in common one original and enigmatic feature: these human heads
are composed of natural elements such as fruit, flowers, fish and many
other objects. This type of visual pun is often used in advertising
today.
Links open in a new window.
For a source of images of the paintings visit:
http://www.abcgallery.com/A/arcimboldo/arcimboldo.html
For a short biography:
http://www.abcgallery.com/A/arcimboldo/arcimboldobio.html
Step 1: Preparing your resources
For detailed instructions on how to set up an image bank
or topic resource click here for PCs
or here for
Macs
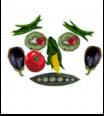
1. Collect a resource bank of images of fruit, flowers, vegetables, leaves and other objects either by taking digital photographs, scanning images collected from magazines, scanning real objects such as leaves, or searching the Internet for images.
2.
One of the most useful search engines for pictures is
Google:
www.google.com
>
Images
3. Make a new folder to save the images in and name it Arcimboldo. Save them as .GIF or .JPEG files.
Step 2: Making the composite
portrait
-
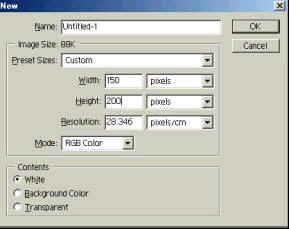
Start Photoshop and go to File > New. Set the image size and background from a choice of White/Transparent/Background Colour. In the example I have set Width 200 pixels, Height 300 pixels and Background White > OK
-
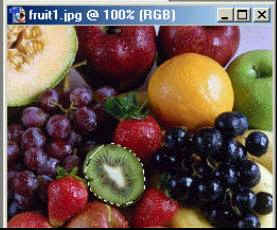
Now open one of your saved images of fruit etc e.g. fruit1.jpg: File > Open and navigate to the folder you made . The eye on my composite portrait will be constructed from a kiwi fruit with a strawberry as the iris.
-
Activate the fruit image by clicking on it, then go to the vertical toolbar on the left of the workspace and from the fly-out menu select the Polygonal Lasso Tool icon.

-
Use the tool to click around the outline of the fruit. When the marquee encloses the selection and has connected with the start point, double click to close the border. To undo the selection at any stage press Escape. To undo the last action press the Backspace Key.
-
Go to Edit > Copy
-
Click on the new blank canvas to select it and go to Edit > Paste. Photoshop automatically pastes it onto a new layer.
-
You position the kiwi using the Move Tool

-
Choose Edit > Paste again for a second “eye”. There are now 3 layers to the image: save it to your Arcimboldo folder as my_arcimboldoRM.psd using your own initials as the last 2 letters of the file name.
TIP: Always check that you are working on the correct layer. The active layer is blue on the Layers Palette. To make a layer active, click on it. -
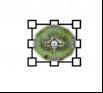
You can change the size of the “eye” by activating its layer and going to Edit > Transform > Scale, which places handles around it: drag a corner in or out to change the size. Go to Edit > Transform > Rotate to change the angle.
-
Repeat steps 2-9 until you have built up the face


-
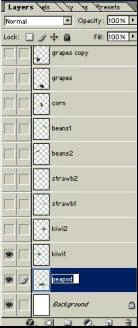
As this activity generates multiple layers (mine had 22) it is good practice to give each layer an easily identifiable name: double click on the current layer name e.g. Layer 3 then rename it in the dialogue box that appears e.g. peapod. This will make it much less confusing when moving between layers to make adjustments.
When you have completed the composite portrait you can flatten the layers and save a version as a JPEG to optimise file size [but remember to Save As with a different filename so that the original layered PSD file is available for further formatting or to make an animation in ImageReady]. Go to Layer > Flatten Image, then from the File menu select Save As > File Type > .jpeg and type in the new name e.g. my_arcimboldo_RM2. In this example the file size was reduced from 252KB to 131KB. You can reduce this further by changing the image size: Image > Image Size. Check the Constrain Proportions box and type in a lower figure for either the height or width.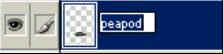
Step 3: Animating the portrait
1. With the unflattened PSD version of your composite portrait open in Photoshop, launch Image Ready: on the File menu, select Jump to > Adobe ImageReady 3.0 or 7.0 or use the shortcut Control + Shift + M
2. You will need to have the Animation and Layers Palettes visible: Window > Animation; Window > Layers
3. Working with both the Animation and Layers Palettes, click on the first frame of the animation and choose Animation > New Frame or click on the New Frame icon.
![]()
4. With the new frame
selected go to the Layers Palette and select Layer
1. Switch off all the visibility icons except the one for this
layer so that Layer 1 is the only layer visible in
Frame 1
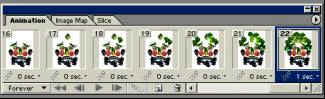

5. Repeat steps 3 & 4 to create a new frame for each layer and switch off all but one corresponding visibility icon for each of these.
6. Click Play on the Animation Palette to play the animation.
7. Set the animation to play once only, continuously or for a fixed number of repetitions using the Loop Count option: Once/Forever/ Other > enter the number of plays
8. Set the Frame Timing if you want to modify the delay between frames e.g. for emphasis on the first frame
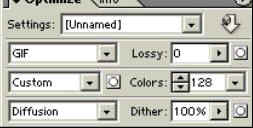
9. Optimize the animation as a
GIF file to reduce download times. Set the options on the
Optimize Palette, which can be opened from the
Window menu. You can preview the effects of reducing file
size by optimizing 2-Up or 4-Up and the
relative download times in the picture window. Next go to File >
Save For Web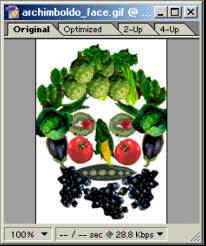
10. Check what your animation will look like in a browser: File > Preview In and choose your target browser from the sub-menu
11. Finally go to File > Save Optimize
Home - Projects - IWBs - Interactive - Image Manipulation - Animation - Presentations - Multimedia Tutorials - Other Tutorials - Art Links - About