|
Faux Turquoise |
From "Jewelry Making" |
|
Lisa Pavelka shares her formula for using
polymer clay to create the look of turquoise.
|
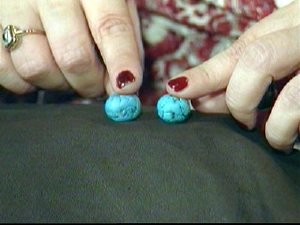
Finished "turquoise" beads. |
|
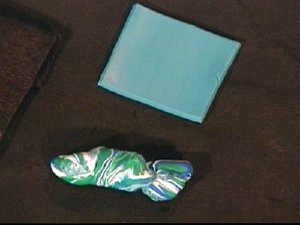
1. Mix equal parts of
blue, green, and white clay to make turquoise (figure A). |
|
|
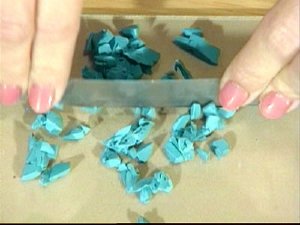
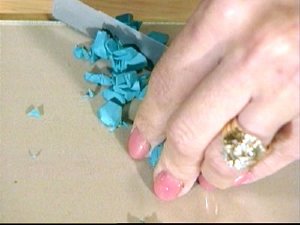
2. Use the clay blade
to chop the turquoise clay into small chunks (figure B). |
|
|
3. Lightly compress
approximately one tablespoonful of the chopped clay into a ball with the
palms of your hands (figure C). 4. Use your palm to
roll the clay back together leaving the crevices in place and create an
authentic appearance. If it is too smooth, gouge and scratch the clay’s
surface with the corner of the clay blade to add new ones. 5. Bake in a 275-degree
fahrenheit oven for 40
minutes. 6. Rub black acrylic
paint over the entire surface of the cabochon. Make sure to get the paint
into the crevices of the clay. 7. Using a light
touch, rub off as much as possible with a baby wipe. Do not wipe paint out of
the crevices. 8. Once the paint is
dry, sand the beads with moistened 600 grit wet dry sand paper and buff to a
high shine on a muslin wheel. Hand buffing may also be done with a cotton
cloth or piece of denim. Clay may have to be sanded several times to get the
look of polished turquoise. |
RESOURCES: GUESTS: |