Reprinted
from. Abnormalarts.com
|
February 2006 |
Supplies List for
Roll-Up Beads...
· White polymer clay ( I used Sculpey
brand. Use whatever you have.). · Cardboard from cereal box to use as a template. · Ceramic tile (to use as a work surface and to use as a
baking surface.). · One large rubber stamp or one clean tennishoe (yup! I said a tennishoe.
The soles make great rubber stamps.). · Rubber brayer, acrylic roller, or a glass (something to
use to roll your clay out. If using a drinking glass do not use it to
drink out of again.). · Oven or toaster oven. · Oven Thermometer (Optional) · Polyester Batting. · Toothpick · Q-tip (type with the pointed end). · Acrylic Paint (I used the color Burnt Umber
but use whatever color you like to contrast with the white polymer clay you
are using.). · Paint brush or sponge brush. · Acrylic Spray Sealer. · Pasta Machine dedicated to be used only for polymer clay
(Optional). · Tissue Blade (available at the craft supply store in the
polymer clay isle.) or craft knife with sharp blade. · Paper Towels. |
I call these beads "Roll-ups". They are very easy to make. |
|
Condition your clay in your pasta machine. Run it through about 25-30 times on the number 4 setting. (If you don't have a pasta machine your hands will do just fine. Just keep smushing it and squeezing it over and over until it is soft, warm, and pliable. When you are done conditioning it flatten it out onto your work surface to a thickness of about 1/8th of an inch.) |
|
|
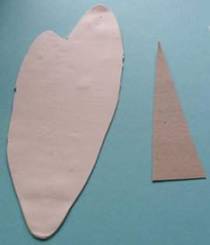
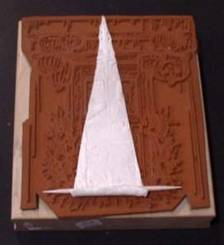
Here is my sheet of polymer clay and I have cut out a cardboard triangle to use as a template so that all my beads will all be the same size. The template measures 1 inch wide at the bottom and 4 inches tall. |
|
|
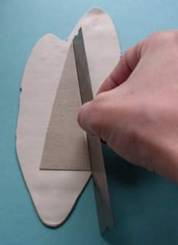
Lay your template on top of your clay. Using your tissue blade or exacto knife, cut out your clay triangles. |
|
|
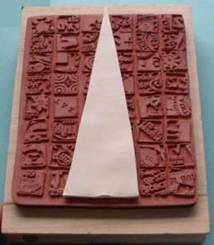
Lay your clay on a rubber stamp that's large enough to accommodate the whole piece of clay. (you may want to brush your rubber stamp with corn starch or talcum powder to prevent the clay from sticking to the stamp.) |
|
|
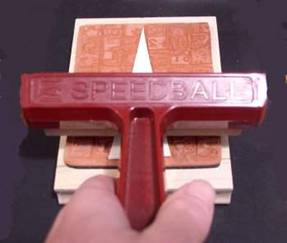
Now use your brayer, wood dowel, or acrylic tube and roll over your clay with sufficient pressure to make a deeply etched image in your clay from your rubber stamp. |
|
|
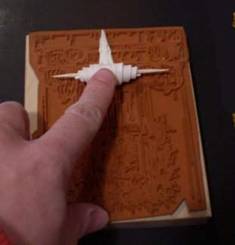
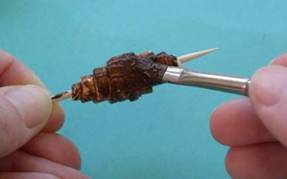
Place a toothpick over the bottom edge of your clay triangle and roll the bottom on the clay over it just slightly. |
|
|
Roll your bead up in a smooth long motion but make sure you don't put too much pressure on it or your image will get distorted. The clay will stick to itself without your help so no pressure is necessary. |
|
|
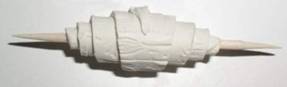
Here is our bead all rolled up. |
|
|
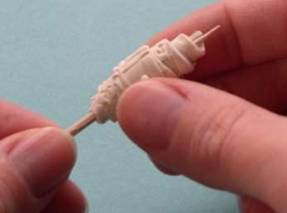
Remove the toothpick by firmly holding the toothpick with one hand while gently twisting the bead with the other. The reason you should remove the bead before baking is not that the toothpick will burn but the clay will bake onto the bead and it will be harder to remove later. |
|
|
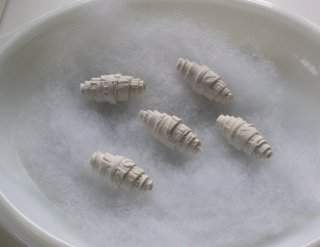
I have placed my beads on my polyester batting and placed them on my baking surface. They are ready to be baked. |
|
|
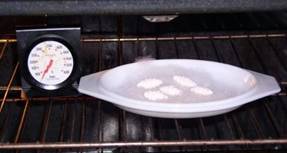
Place your beads in the oven with your oven thermometer and bake according to your clay manufacturers recommendation. When they are done baking let them cool inside the oven. |
|
|
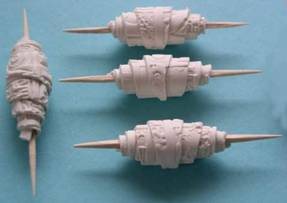
Here are my baked beads. I have placed the toothpicks back into my beads. It gives me something to hang on to while doing the following steps. |
|
|
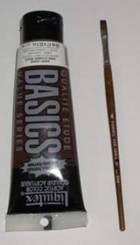
Now it's time to paint. Get out the burnt umber acrylic paint and a paint brush. I use a paint brush instead of my fingers for this type of bead because you can't get into the v-channels without a paint brush. You can also use a sponge brush for this step. |
|
|
Paint the entire bead but work quickly because acrylic paint dries very rapidly. |
|
|
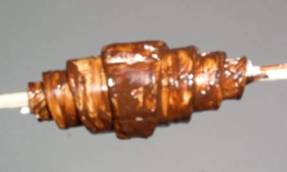
Here's the bead all painted. Do not let the paint dry on the bead. You will be removing the surface layer of paint. So move quickly to the next step. |
|
|
Now you must remove as much paint as possible from the raised surfaces of the clay. The easiest way to accomplish this is by using a beauty q-tip. It has a pointed end that really helps to get into those hard to reach areas. You can get these at the drug store in the make-up isle. |
|
|
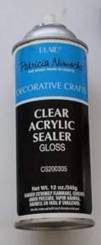
My beads are dry and it's time to seal them with Clear Acrylic Sealer. You can also use a number of other sealers on the market. You can use a paint on type like a varnish but I prefer to use the spray sealer. I would give it 3 light coats letting the beads dry between coats. |
|
|
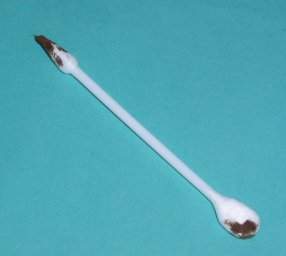
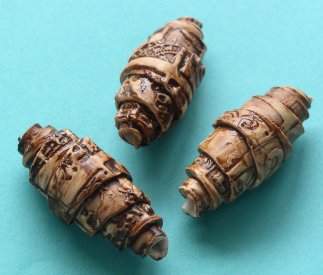
Remove your beads from the toothpick. Here they are, all ready to be implemented into my next project. You can use them for jewelry, macramé, or whatever. |
|
|
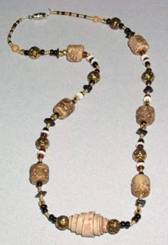
Here is a necklace made with the beads we just made. I used a rubber jewelers cord to string it since this necklace has some weight to it. I used small gold ball beads to space my large polymer beads out. I also used a variety of medium and small spacer beads between the gold beads and the polymer clay beads. Click on the picture for a larger view. |
|
|
|
|
)