|
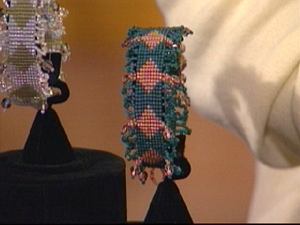
Loomed Bracelet |
From "Jewelry Making" episode DJMK-108 |
|
Sharon Bateman loves to bead, and she's even invented her own beading
looms to streamline the process. Here, Bateman shares a technique to creating
a loomed bead with a diamond pattern and fringe. Materials:
|
|
|
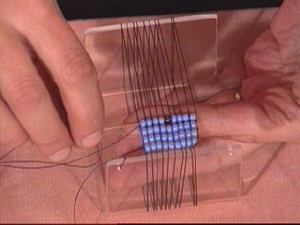
1. Thread the loom
using instructions provided. String on 10 warp threads for the 9-bead width
of the pattern. 2. On any loom, you
will have warp threads. These threads are strung onto the loom that you will
use to weave the beads to and support the fabric of your work. If you are
using a traditional loom, you will need to adapt the pattern for weaving in
the warp threads, depending on the size, length and clasp desired. We have
chosen the diamond motif. For the length of the bracelet you will need to
measure the length desired and make only the number of diamond motifs to
create the length. 3. Thread a No. 12
needle with a weft thread and several seed beads. |
The Loom Stitch: To weave the loom stitch you will weave the
beads onto the warp threads. The thread used for this is called the weft
thread. Bring the beads under the warp threads to the opposite side. The warp
threads will create a "parking place" for each bead. Push the beads
up into those parking places and run the weft thread needle back in the other |
|
4. Direction (figure
A), through the beads, making sure it is over each of the warp threads as
you work. |
|
|
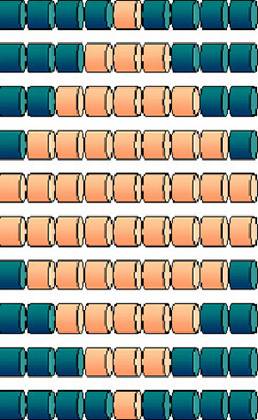
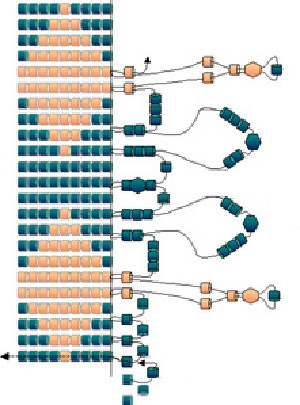
5. You will work the rows following the graph (figure B).
Color 1 is the base. Color 2 is the diamond shape. |
|
|
5. Repeat the Diamond
Motif (figure C) until there is no room left to work a complete one
and fill in the remaining space with color 1 and tie off the weft thread. |
|
|
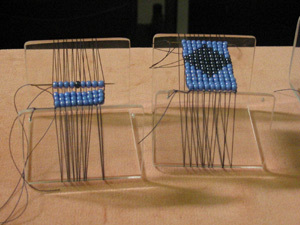
6. Remove the bracelet
from the loom and rub it between your hands so that all the rows are spaced
evenly. 7. To embellish the
edge of the bracelet you will work a Mandala edging
of 3 bead picots (set of beads in the edging) along the section that is solid
color 1, from one diamond point to the next. 8. Starting at the
first diamond point, you will work a short 2-legged Mandala
edging at the diamond point and stitch. 9. Repeat the
combination for the Mandala edging around the
bracelet, working from point to point along the diamond motif of loom work.
Continue with the 3-bead picots along the solid color section (figure D).
|
|
|
10. Finish bracelet
with Mandala edging around the whole rim. 11. Close the edging by
stringing 1 bead of color one and running down through the very first bead of
the Mandala edging. Run through the nearest row to
bring the needle out on the opposite side. 12. Repeat the edging
on the opposite side of the bracelet (figure E). 13. Once the edging is
complete, add a loop and bead clasp. |
|
|
GUESTS: |
|