Building A Silk SteamerIn July 2002, I finally put together a silk steamer. For the past few years, I'd been coiling the scarves into a large pot used for canning (See the picture of steaming in the shawl demo). But the scarves get more twisted and wrinkled that way, and sometimes condensation droplets get caught in the wrinkles and dilute the dye on the silk, as can be seen at the end of the shawl demo. So I put together a steamer similar to the one my teacher Joy-Lily uses so that the silk can be rolled without twisting and hang straight above the steam, not too close to the water. The following pictures show how all the parts of my home-made steamer work together. |
|
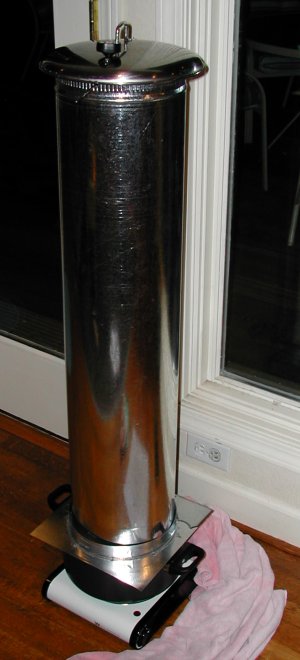
| I
start with an electric hot plate and a large pot with water. The rim of
the pot is flat and relatively wide, the handles are flat and are lower
than the rim so they won't bump into anything resting on the rim. This way
the rest of the steamer hardware can rest solidly on top of the
pot.
The flange resting nearby will form the base for the steamer tube. |
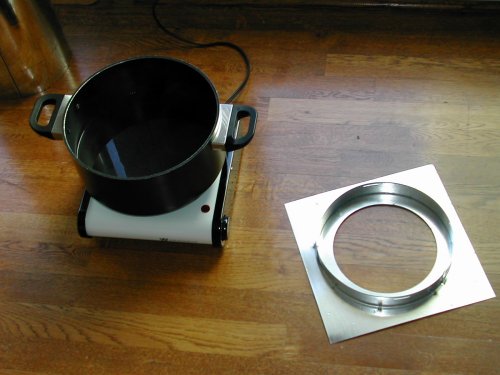 |
| I found the flange at the hardware store. It is meant for the top of a vent. The inner hole is 8" across; a band of metal forms a 12" perpendicular ring around the hole. | 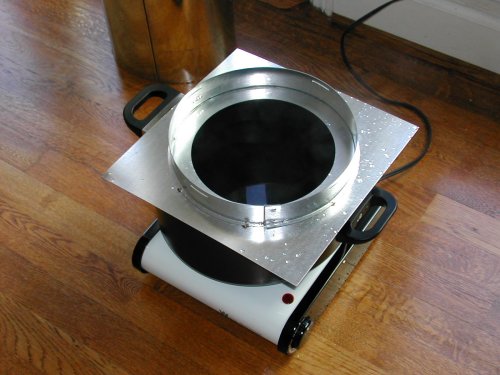 |
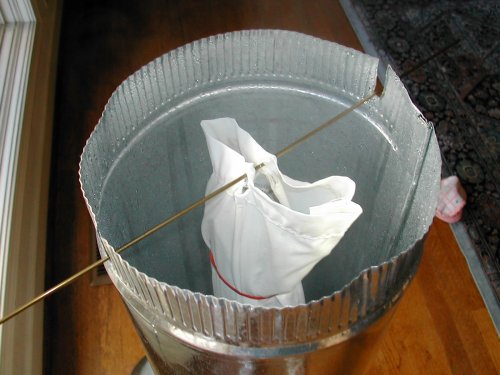
| The steamer tube is a stove pipe, 10" in diameter and 36" long. I set it vertically on top of the pot, resting inside the ring on the flange. | 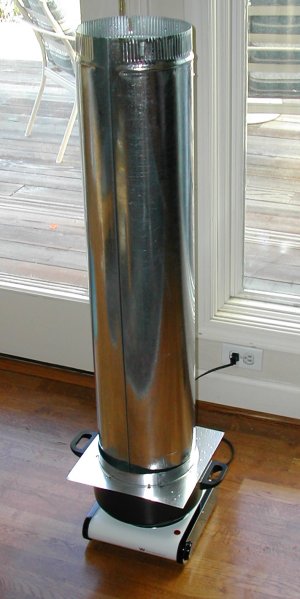 |
| Looking down into the steamer from the top. There's the hole
in the flange, letting the steam in. Notice the condensation droplets on
the side of the tube. I took this photo after a steaming session, when the
tube was cooling.
Notice also the two slots in the top of the tube. I cut these with metal nippers. They'll hold a wire which will suspend the bag with the silk (see later picture). The notches are about 2" long so the ends of the wire clear the steamer lid.. |
 |
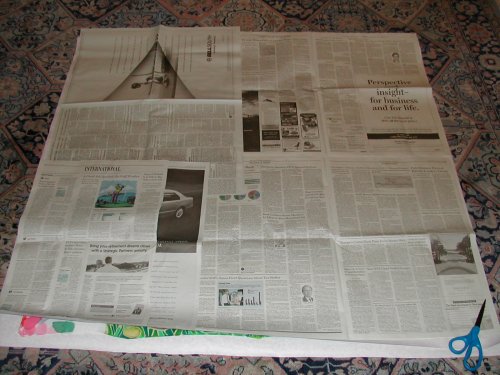
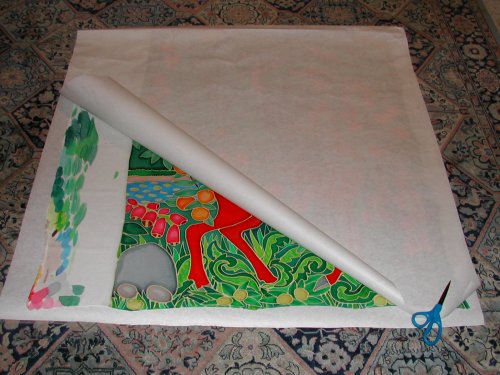
| To
prepare a silk for the steamer, I place it in a sheet of white butcher
paper with the non-shiny side against the silk. I purchase butcher paper
from a store that carries supplies for grade-school teachers; you can get
it at some art stores as well. You can also just use newspaper, but I like
having the layer of clean white paper so that newsprint ink doesn't steam
into my silk! I place layers of newspaper over one side of the paper (next
photo).
Not shown: I roll the silk up, then roll more newspaper around the rolled-up silk (so that there is newspaper both inside the roll and outside the roll). So far I seem to need about 2-3 layers of newspaper both inside and outside the roll. Less than that, and the dye wicks through as it steams and touches dye on another part of the roll, leaving a mark. Note: If the silk (as in these photos) is larger than 30" long, I fold it once before rolling, so that the side I roll from is no more than 30" long. Why?... |
|
| ...Because the bag to hold the silk in the pot is 31" long. It is deliberately several inches shorter than the height of the stove tube, to avoid having any water splash up from the bottom and damage the silk. The bag is 7" wide, and made from a piece of old sheet. | 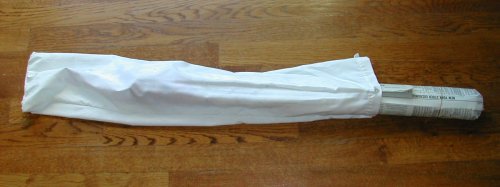 |
| The original hem of the sheet is at the top of the bag, so
it's reinforced in the spot where I cut two slits to let a wire cut from
the bottom of a coat hanger pass through after the rolled-up silk has been
placed in the bag. The wire rests in the slots in the steamer tube.
When placing the bag in the steamer, I must avoid touching the wet sides of the steamer, since the water could wick in and dilute the dye in the silk. So I rubber band the outside of the bag to keep it from flopping. |
 |
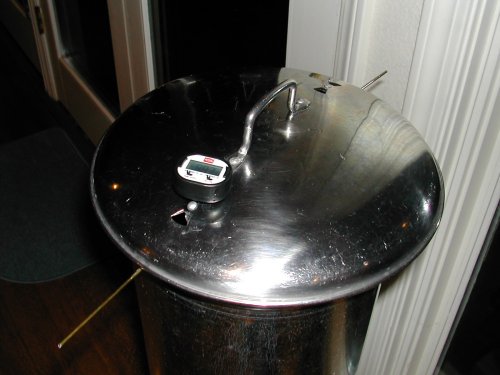
| To
top my silk steamer I use a lid from my vegetable steamer, which fits
nicely on top of the tube. I put a meat thermometer through one of the
vent holes, so I can monitor the temperature (you can see it better in the
next picture).
Some of the condensed water from the steam oozes out under the flange, so I have to put a towel around the base to catch the drips. Once the water is boiling, the top of the steamer at its hottest is about 186-188 degrees Fahrenheit. The bottom is presumably about 210 degrees (the temperature of boiling water!). I steam my scarves for 20 minutes, so to make sure the whole scarf is steamed at about the same temperature, I hang the scarf and steam for 10 minutes, then remove the bag, turn the roll around (so the top is at the bottom and vice versa), and hang the scarf back in the steamer for another 10 minutes. |
 |
|
I'm still experimenting, but keeping the top of the tube at about 170-180 degrees during the steaming seems to work best -- if the scarf gets too much steam, the dye starts to wick out into the paper. Different scarf materials take the steam differently, so I've got to experiment more to find the right temperature for each! After steaming, I put the scarves into a dryer on high heat for another 20 minutes, to make sure the dye is set. |
 |
| Well, that's it. I've used the steamer successfully and like it a lot better than squishing tubes into the canning pot. The best part is, it was easy and inexpensive to make -- the flange cost about $8, the stove tube about $10, and the electric hot plate about $25. Everything else was made from items I already had around the house. So if you're painting silks, I highly recommend this set-up. | |